The xpna Excel Add-in
Installation
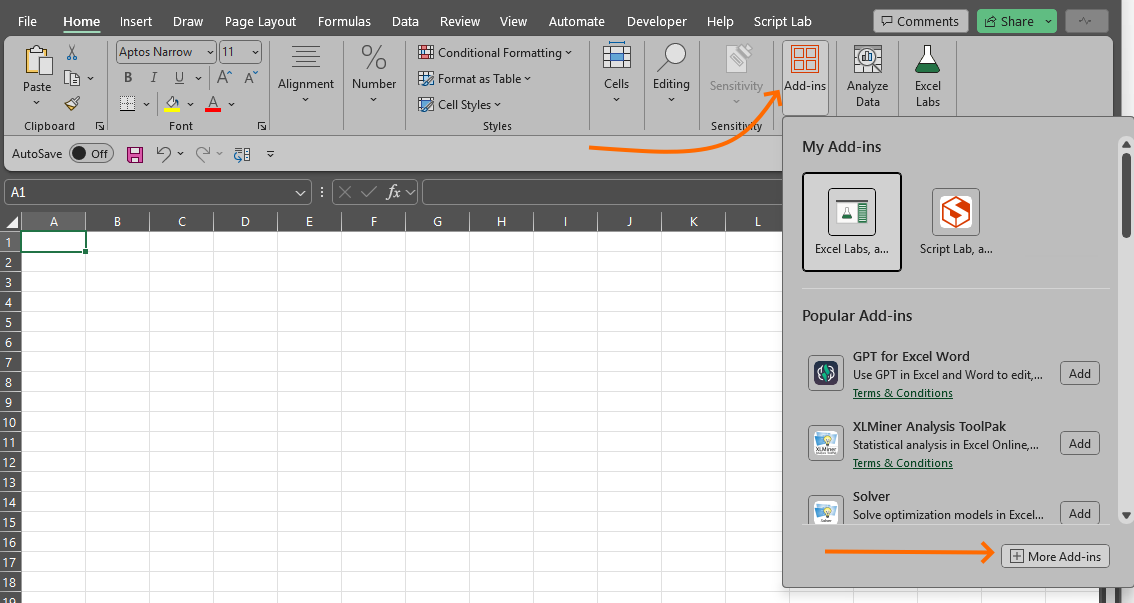
To install the xpna add-in, from the Excel "Home" ribbon, open "Add-ins" > "More Add-ins" to show the Add-in management dialog.
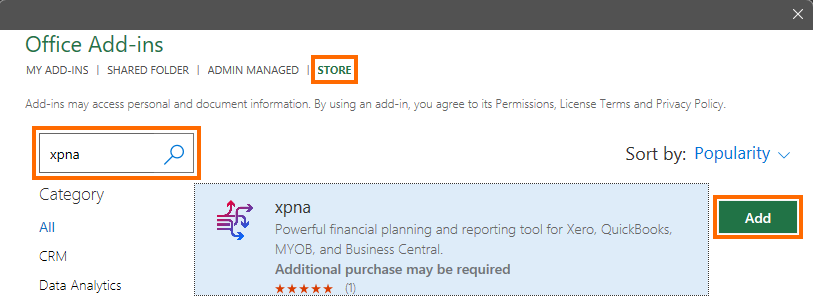
Select the "STORE" section from the options along the top of the dialog and then search for "xpna" and click "Add" on the result for xpna that returns.
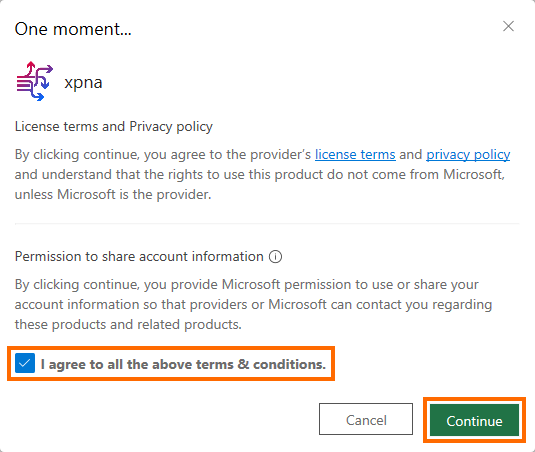
Link through to read the terms and privacy policy and then check "I agreee..." and click "Continue".
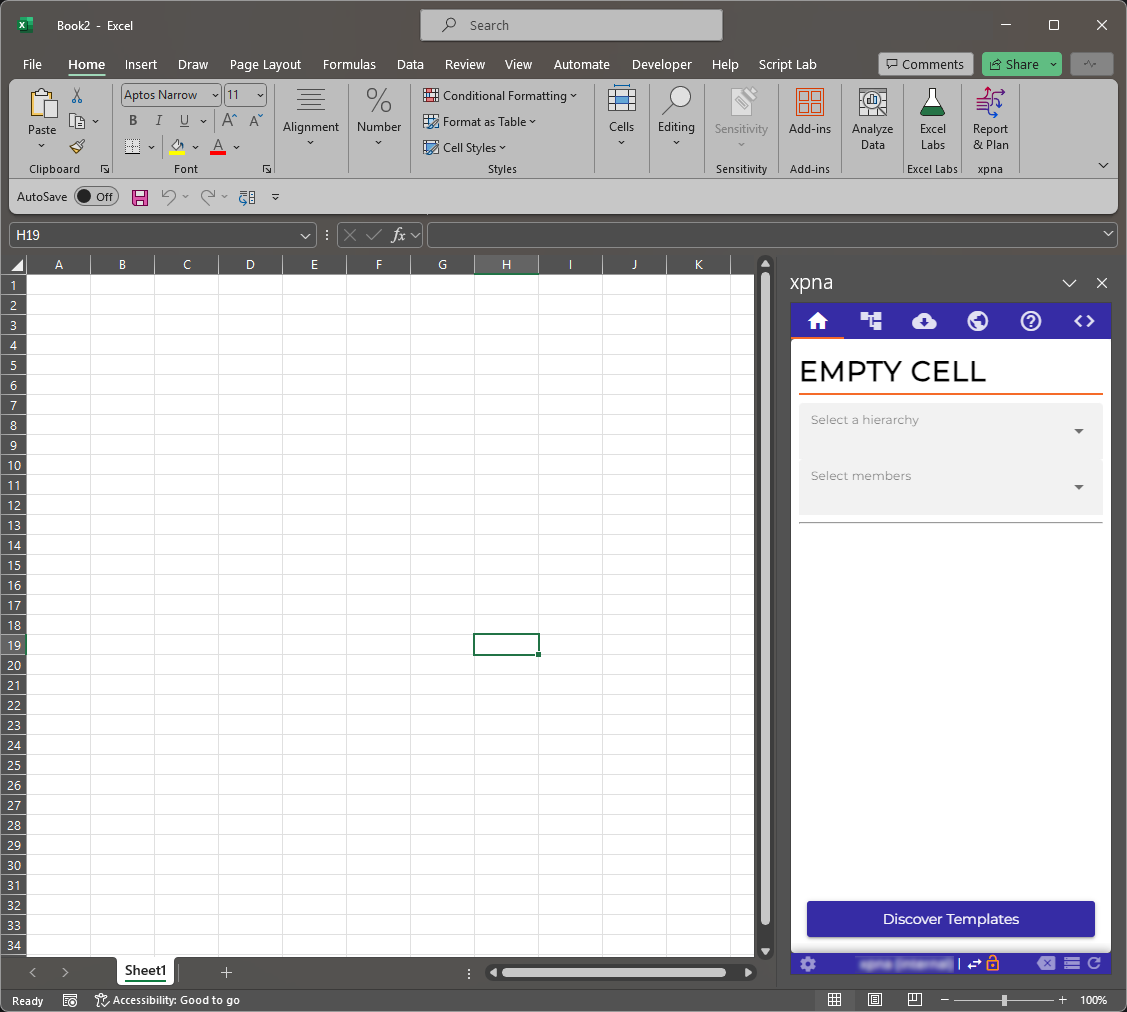
The xpna add-in will load into the "Home" ribbon in Microsoft Excel on the right end.

Clicking the xpna "Report & Plan" button in the xpna group will open the xpna taskpane.
Reloading
Desktop App
To reload the xpna add-in when within the Microsoft Excel desktop app, firstly click somewhere within the xpna taskpane to give it the focus.
This will show the in-built Microsoft Excel add-in menu:
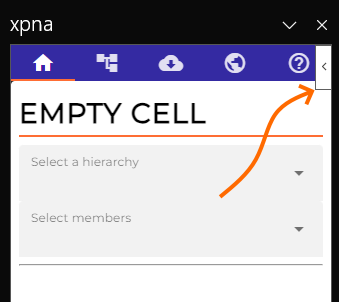
Click this button and a menu wil pop out.
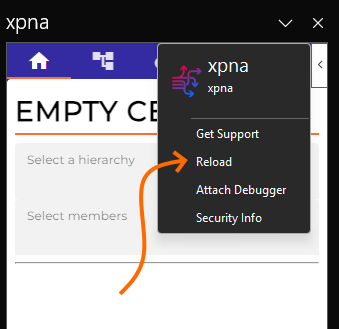
Select "Reload" from this menu and the xpna add-in will get reloaded by Microsoft Excel.
Web
To reload the xpna Microsoft Excel add-in when within the web version, just reload the entire webpage.
Re-installation
If the xpna add-in is already loaded, re-installation can be achieved by doing the following:
From the Excel "Home" ribbon, open "Add-ins" > "More Add-ins".
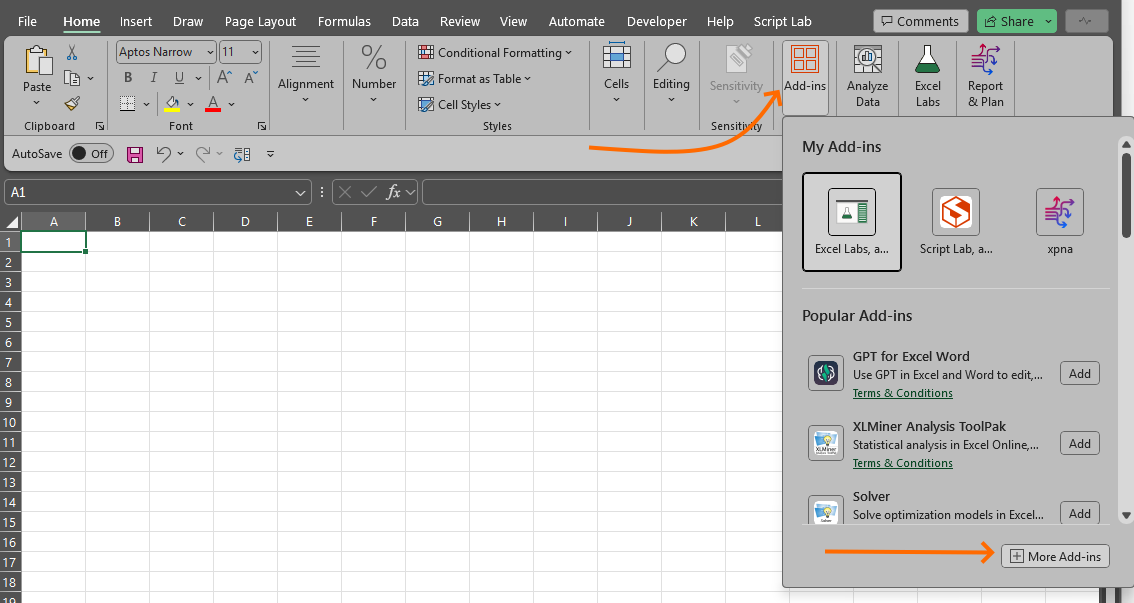
Remove the add-in
Select the "MY ADD-INS" section then find the xpna add-in and using the menu "Remove" it.
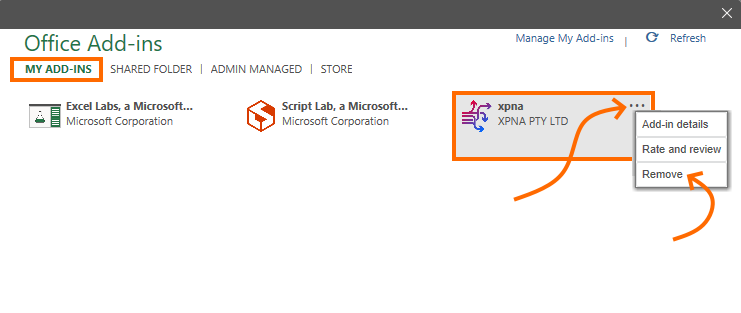
Important:
Before installing the add-in, close down Microsoft Excel and restart it to make sure it clears its caches of the xpna add-in.
Install the add-in
Follow the installation instructions above to install the xpna add-in.
#NAME Errors or _xldudf_ Errors
A known issue within the Microsoft OfficeJS add-in architecture can sometimes cause custom functions, such as those used in xpna, to return as #NAME and to appear in the formula bar as _xldudf_.
If this occurs, the following methods can help resolve the issue.
Option 1: Fast Reinitialize
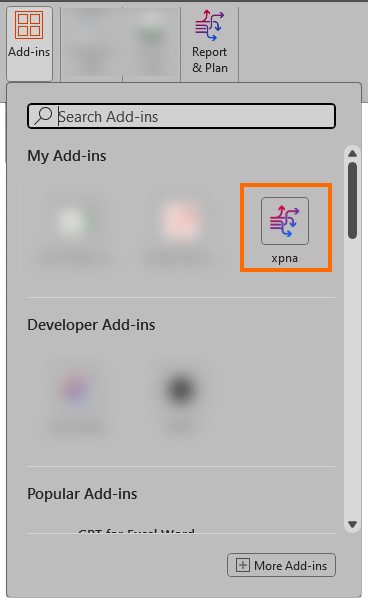
To perform a fast reinitialize, click the Add-ins button on the Home ribbon to launch the Excel Add-ins popup, then click on the xpna add-in icon.
This action instructs Excel to perform a lightweight reset of the add-in, conduct checks to ensure it is set up correctly, and reset the custom functions.
Note:
If the add-ins popup does not look like the image above, then the version of Excel may not have this feature yet and a re-installation of the xpna add-in is required
Option 2: Perform Re-installation
If the fast reinitialize did not resolve the issue, a re-installation of the xpna add-in is necessary.
Follow the instructions above to complete this process.
xpna function cells not resolving or updating
Sometimes, Excel's calculation chain can get stuck and not update the xpna functions when new versions of Excel are released. This problem manifests itself as the xpna functions not resolving or updating and showing a "busy" icon (shown below) in the affected cells.

To resolve this issue, press Ctrl + Alt + Shift + F9 to force Excel to rebuild the calculation chain in the workbook.