Acumatica Connected App Configuration
During this configuration there are three pieces of information that need to be collected for xpna to connect successfully:
Endpoint URLThis is the main URL for the Acumatica instance
Client IDThis is created at the end of Step #5
Client SecretThis is created at the end of Step #3 and is ONLY visible at that time
Progressing through the steps, each of these items will need to be stored safely for use when connecting xpna to this instance of Acumatica.
Step 1
Firstly, open the Acumatica instance and copy the starting part of the URL for use as the Endpoint URL
Note:
This is usally in the form of:
- MYOB Acumatica:
https://<instance_name>.myobadvance.com/- Acumatica:
https://<instance_name>.acumatica.com/orhttps://<instance_name>.yourdomain.comif using custom domains
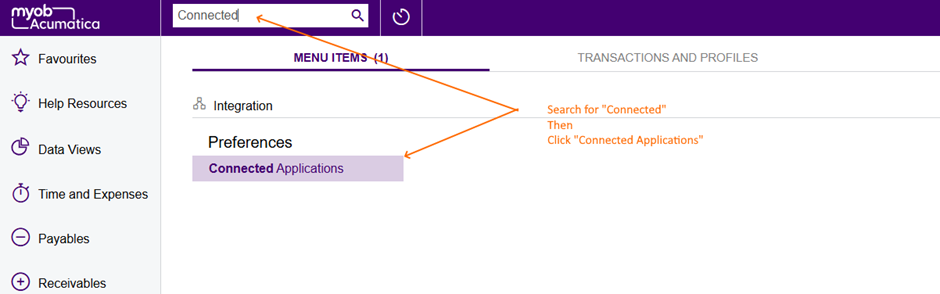
Now, create a Connected Application for xpna by using the search feature in Acumatica to find the relevant configration area.
Note:
You will need to be an administrator to perform this function
Step 2
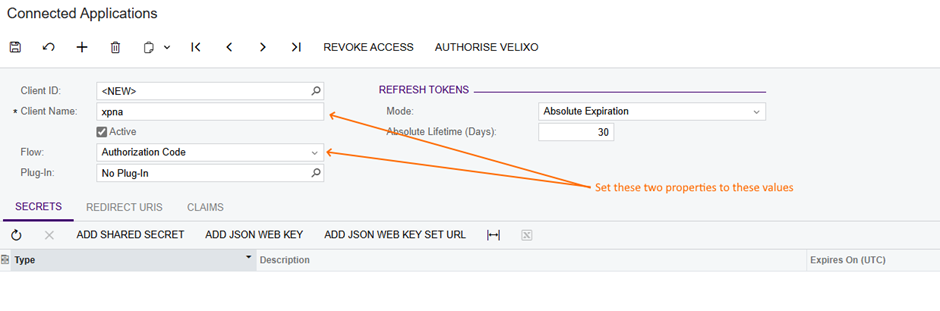
Give the Connected Application the name xpna and set its flow to Authorization Code
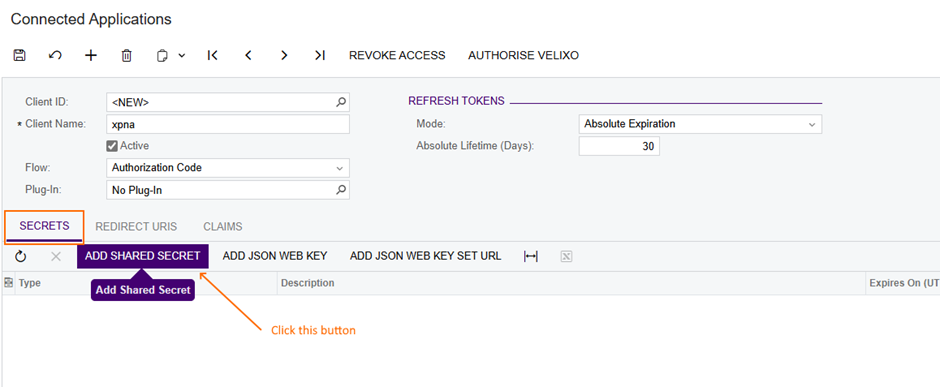
Step 3
Create a new secret.
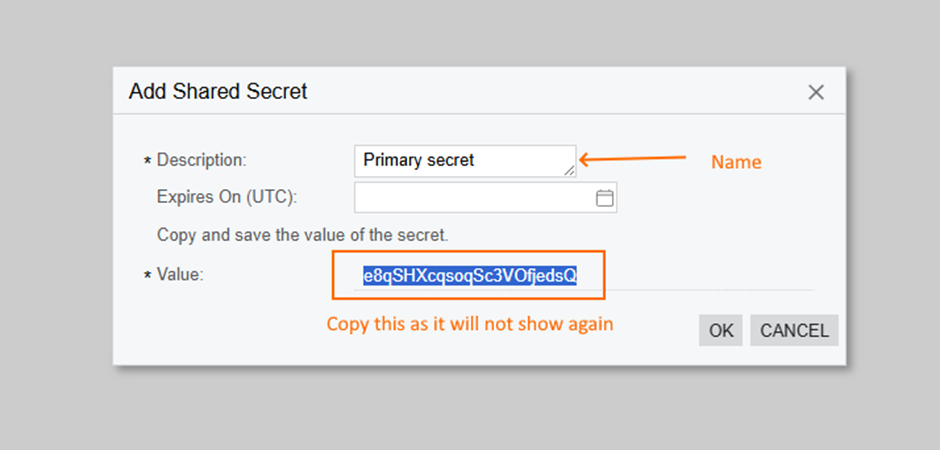
NOTE:
At this point the secret will show. It will ONLY show here, so copy as the
Client Secret.Press OK when done.
Step 4
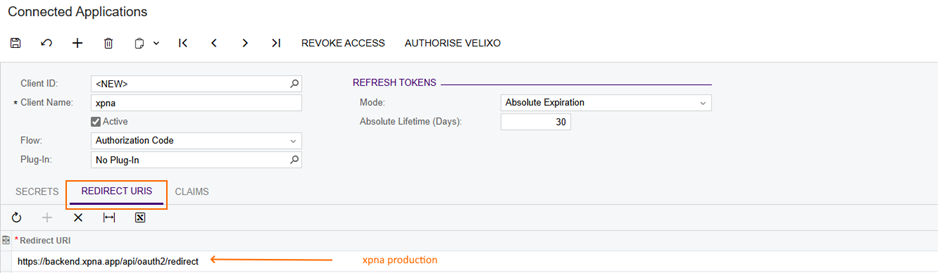
Add in the require redirect uri:
Step 5
Save the newly created Connected Application
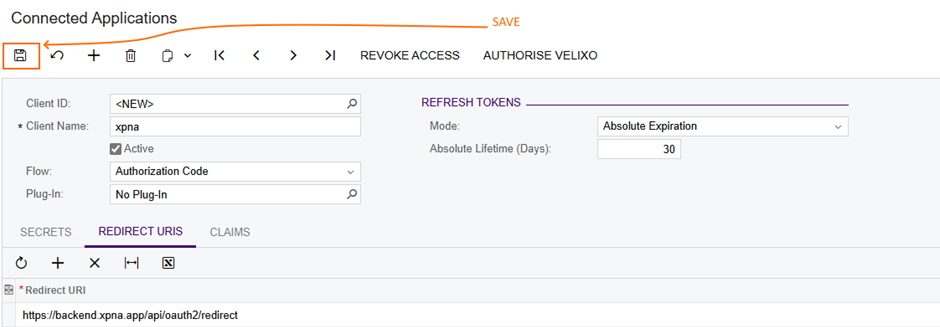
This cause the Client ID field to change from <NEW> to a value. Copy this as the Client ID.
Finally
Ensure these three configuration values are securely saved for use when connecting xpna to this instance of Acumatica.